In the last week, I attended a training called “Training from the Back of the Room” by Sharon L. Bowman. In this blog post I want to write about the 4Cs – a four-steps teaching model that is easy to apply and helps to move information into long term memory. Learn how to convert listeners into real learners!
Overview:
- Do you want listeners or learners?
- What’s in it for you?
- How to apply the 4Cs
- 4Cs Map as an example
- Further information
Do you want listeners or learners?
In many events and occasions, I’ve noticed that many coaches and trainers are running a very classic and old fashioned way of teaching and delivering information. Many trainers and teachers think that people will learn their topic just by listening to their words or showing straight their PowerPoints while talking.
Indeed “Listening” is a quite complex process for humans. Listening requires at least that the person is open for the topic and willing to listen. If someone doesn’t want to hear what you want to say, then there is no way to teach it – Listening requires the concentration of a person.
However, one of the most interesting details I found out on my research was that whatever you listen or hear is NOT automatically memorized in the brain – All information that goes through the ears are received by the brain but is not necessarily saved. As long as people are passively sitting and listening to words, they are NOT actively learning much. Until this point, a listener can save information only to the short-term memory.
The long-term memory must be triggered actively, therefore it’s very important for a listener to get the whole understanding of the context in order to bring the context to a right order and sense.
Learning is not a linear, one-thing-at-a-time brain activity. It happens on several levels at once in the human brain. This is why the 4Cs teaching model is so effective. It activates all of these levels in the brain and helps the trainer and especially the learners to move information into long-term memory by bringing the following steps into order: searching, receiving, understanding and saving information.
What’s in it for you?
The term “4Cs” is a shortcut for Connections, Concepts, Concrete Practice and Conclusion – a remarkably effective four-step design process for trainers, coaches, teacher or scrum masters. It’s a model based on accelerated learning. So if you want to create real learners for your topic, you should definitely create a fun and memorable learning experience. The 4Cs model is a very brain-friendly approach that can help you to structure your training topics or any other kind of information delivery. You can design your training in a very short time to deliver outstanding results no matter what the topic is.

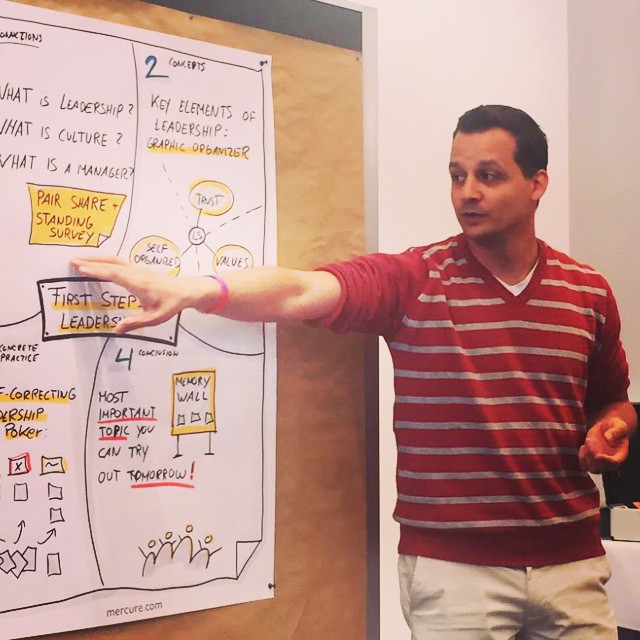
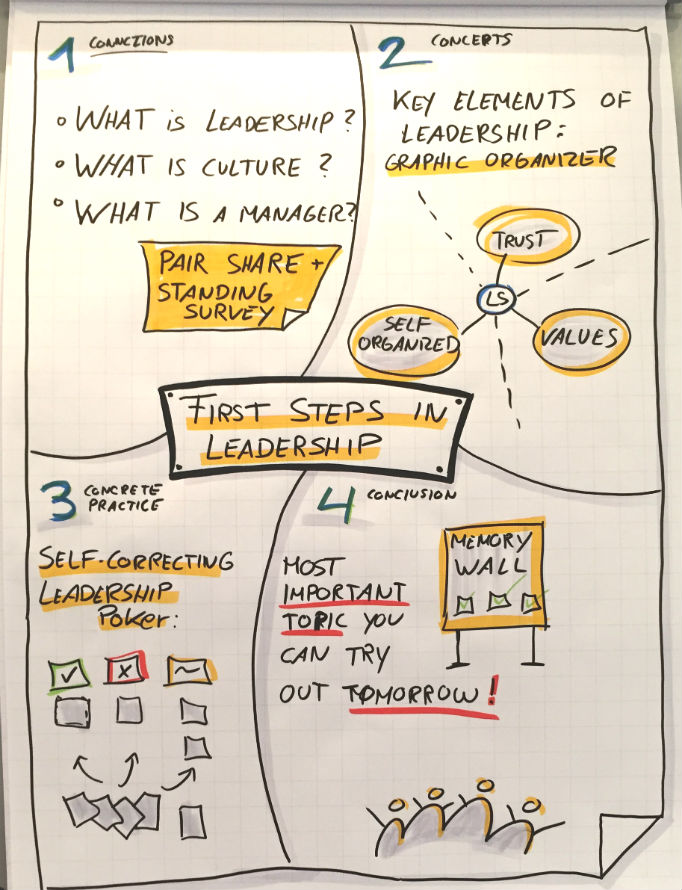
Presenting my 4Cs Map about “First Step In Leadership”
How to apply the 4Cs Map
The quickest & easiest way to teach something is using activities: encourage all participants in the activities along the way so they will learn more and be able to apply what they have learned. The 4Cs method works with a toolbox full of actions and activities that you can use for this model. You are free in choosing the tools and activities you want but it is important to follow the model step by step.
Check your content
Be aware to stay focused all over the 4 steps. In the following example I want to show you how I used the 4Cs model to teach a group about the topic “Leadership”:
C1 – Connections
The Connection part is the very first step in starting your training. Your learners will make connections with the topic by telling each other what they already know, what they actually expect and what they want to learn.
You are very free to choose different warm-up techniques in order to make connections. This helps everybody to get on board and the trainer gets a big picture of existing knowledge. It can help the trainer to adjust certain activities in the next steps.
Example activity for C1: THE GALLERY WALK
Set up a number of flip-charts on the walls of the training room and make sure that there is enough space between the pages so that participants have to walk from one sheet to another. On each chart you write down a phrase, statement or question related to your topic. Now learners can answer on it by writing or painting on the same page as a group or alone. Then learners take a “gallery walk” to read every single chart and write down their observations. They take a few minutes in groups to discuss their observations.
Other activity examples for C1: Quick Start, Dot Voting, Pair Share, Fast Pass, Standing Survey. (Learn much more activities in this book)
C2 – Concepts
In this step, you actually start to teach content in very small chunks like in 10-20 minute lecture-segments. Participants will receive the new information in multi-sensory ways such as seeing, hearing, discussing, writing, and most importantly teaching the topic to others!
My tip is to follow each lecture-segment with a 1 minute review because this is the moment where the participants have to transmit the knowledge that they just learnt to the learners.
Example activity for C2: MYTH OR FACT GAME
For this game you have to prepare around 30 cards with statements that are a either a myth or a fact regarding to your learning topic.
Tell your learners to form groups with 3-5 persons. Let them know that they have to choose a facilitator for each group. Place 2 cards labeled with “Myth” and “Fact” on the table. Now pass them the 30 cards you prepared in advance and put them upside down on the table so that they can’t see it. Now the players start turning them around and read out loud the statement. Together they decide if it’s a myth or a fact. If they do not agree within the group they will start discussions and decide what they gonna do. After 5-10 minutes you end the session – regardless if the group finished the game or not. Now the facilitator of the group comes up with the answer key and rechecks if the answers were correct or not. If their answer was different than the answer key they will start a discussion which is super helpful for the group. (Here you can download an example of a “Myth or fact game” by Sharon L. Bowman)
Other activity examples for C2: Graphic organizer, Quick Write, Self-Correcting Worksheets (Learn much more activities in this book)
C3 – Concrete Practice
Real learning happens when the trainer or teacher stops talking and the learners start talking.
Therefore in the third step all participants have to use the new knowledge in practice so that they can develop real skills in what they learnt and let them become active creators of their learning experience from the previous step.
Example activity for C3: Teach Backs
The Teach-Back technique is an activity to recheck knowledge of the learner. It helps the person to check if the content was understood correctly – and if not he has the chance to understand it even better. Depending on the size of the group you can start this activity directly with the whole group or you divide it into 2 new groups. Make clear that there is a save environment where people are allowed to fail because this is quite important as we want that every single learner will understand the topic. Every person gets the chance to explain the new content with his own words. The big advantage is that if someone understood something wrong there is still the chance to correct it.
My Tip: Chilled background music can help to create a pleasant environment.
Other activity examples for C3: Group Games, Group Discussions, Gallery Walk (Learn much more activities in this book)
C4 – Conclusion
In the closing of your training you give learners time to summarize, evaluate and celebrate what they have learned. After that you create concrete action plans for how they want to use the new knowledge.
Example activity for C4: THE WALKABOUT
Tell the entire group to do a walk in the room or if it’s a sunny day give them the chance to leave the room and enjoy the fresh air. Give them the instructions to walk in couples so that in the first part one person talks and the other listens. On the second half they change roles, so that the listener becomes the talker and the other way around. Give the learners a timeframe which should be around 5 to 10 minutes. In this timeframe couples talk about what they have learned so far and what was the most important detail they remember. They could actually talk about everything that was related to the learning topic of the day. As a trainer or teacher you should observe this session and even join some couples if they have questions. This ending activity is very useful as normally learners remember most what happened in the beginning and in the end – therefore it’s good to repeat and tell the learning topic to someone else.
Other activity examples for C4: Learning Logs, Ticket out (Learn much more activities in this book)
4Cs Map as an example
This is my 4Cs Map about Leadership: In the center of my map I put the topic. Around that I started to divide the 4Cs steps in different segments where I added the relevant information including the activity I planned before. For example when I come to the C3 – Concrete Practices I used the “self-correcting leadership poker” which is a cloze where learners have to fill in the correct solution.

My 4Cs Map about “First Step in Leadership”
In every single step of this process the participants are deeply involved because they are active learners. There is almost no time to sit down and listen – You have them engaged all over the time by using activities that will make them attentive during the entire learning experience.
Further information
As you have seen this 4 step information delivery process requires a lot of different training activities and tools. Before you start designing your training be aware of the strategy you might use in your session. By writing them down before your training starts you increase the chance that you will remember and use them later.
If you want to learn more about different activities I can recommend you the book from Sharon L. Bowman “Training From the Back of the Room!: 65 Ways to Step Aside and Let Them Learn” which introduces many training strategies that will help you to design your 4Cs Training. In this book the author covers many opening activities that connect learners to the topic. Learn about strategies that engage and involve learners, strategies in which learners actively review content and practice skills & celebration activities.
If you want to learn more about the 4Cs, go to www.bowperson.com and read the article titled “Bag It! A Quick and Remarkably easy instructional design process“.
| # | Title | Author |
|---|---|---|
| 1 | Training From the Back of the Room!: 65 Ways to Step Aside and Let Them Learn | Sharon L. Bowman |
| 2 | The Ten-Minute Trainer: 150 Ways to Teach it Quick and Make it Stick! | Sharon L. Bowman |
| 3 | Website of Sharon L. Bowman | Sharon L. Bowman |
| 4 | Receive the “Training from the Back of the Room” Training | Sharon L. Bowman |
Thanks for reading this post! I hope I could give you and overview of the 4Cs design and delivery process. If you have questions send me feedback and feel free to add your comments below!
I would appreciate a star rating for this blog post:


 (10 votes, average: 4.90 out of 5)
Nice post. Pretty good summary of the 4Cs. Thanks
Thanks for your feedback! Appreciate it! Hope it will help you to run your next training!
Pingback: Your Most Burning Questions About Leading 2 Teams as a Scrum Master
Pingback: 3 Incredibly Useful Coaching Tools You Wish You Knew Earlier
Pingback: Scrum Is Bad - 5 Simple Facts That Kill Stupid Arguments About Scrum